 Skip to content
Update boat interiors by updating the bathroom shower curtain! The hardware on many older boats are outdated and replacement curtains are no longer available. This is a project to bring your boat interior interior back into fashion!
Why this Boat Interiors DIY Project is great!
1. It adds style to your bathroom interior.
2. The shower curtain design can then be coordinated with other accessories for even more style.
3. You can easily replace the curtain for a new one whenever it starts to become worn – change your decorating theme anytime.
4. Leaving the length longer and a bit wider keeps a larger area of the bathroom dry and will be dry again quicker. If you push the material over the toilet, you’ll have a shower stool to sit on.
[Side Note – If you don’t sew, you can attach the pre-made strip with tails to the curtain with glue instead. You do not need to sew to replace eyelet style curtain track systems.]
When we recently purchased our newest “Bigger Sailboat”, the shower curtains were the original curtains. Our boat is a 1995 Catalina 36 so you can imagine how unappealing the curtains looked. Aside from the mildew, which could have been cleaned and removed, the curtains were many shades of yellow from all of the sun bleaching over the years.
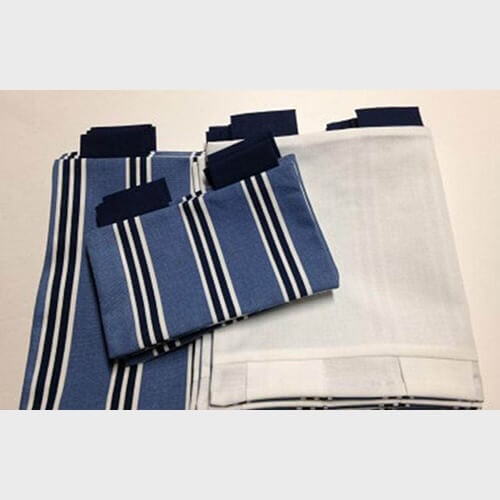
This is a “Curtain Slide – Sew on Tab Style“. Remove the tabs from your existing curtains. Depending on how clean they are, you may want to soak them in a bowl with some bleach first.
Measure your existing curtains or lay them over the new curtains to get your template. I purchased two new shower curtains to have enough width to be able to use the stronger top pleat as the top of my curtains and to sew on my tabs onto. I added a few extra inches in width at each end to provide a bit more coverage than the standard curtain provided. I marked a small line in pen every four inches to plan where the tabs would go and to make sure they covered the entire length of the curtain evenly. I did not cut the length, so I could just cut the length that worked when I installed the curtain. As mentioned before, a longer length near the toilet is recommended. Then the nylon “Tail” can be sewn directly onto your new curtains. I just went forward and backwards on the sewing machine twice for each tab.
Even easier – You can purchase the width of each curtain as a 3/4″ tape with Tail Slides attached, every four inches. Sew the tape to the top of your curtains. Even easier – glue the strip onto your curtains!
Here is the link to purchase the strips: https://www.sailrite.com/Sew-on-Tab-Tape
Now you can create a custom design theme for your bathroom! Be sure to look at our “Bathroom Design Themes” for inspiration!
Replacement Product
If you need to purchase replacement “Curtain – “Curtain Slide – Sew on Tab Style” you can find them here:
http://www.sailrite.com/ourblog/Curtain-Slides-Tab-Style#.U07Jq_ldVoA
If you have this type of curtain track system, you only need to replace the any curtain slides or hooks to add the new curtain.
http://www.amazon.com/JR-Products-81085-Sliding-Curtain/dp/B002UC6U5U
http://www.amazon.com/7142-SS-Stainless-Steel-Curtain-Hook/dp/B00CS3HUDW
http://www.amazon.com/IKEA-RIKTIG-Curtain-Stainless-Steel/dp/B006KF4VYK
Here are pictures of the finished project!


